

This lesson is made with PSPX9
But is good with other versions.
© by SvC-Design

Materialen Download :
Here
******************************************************************
Materials:
_k@rine_-dreams-_Lady_Carnaval_2689_Janvier_2014.png
Disguise1.PspSelection
NarahsMasks_1667.jpg
TextoDisguiseBySoxikibem.png
******************************************************************
Plugin:
Plugin - FM Tile Tools - Saturation Emboss
Plugins - Carolaine and Sensibility - CS-DLines
Plugins - Alien Skin Eye Candy 5 Impact - Glass
******************************************************************
color palette
:

******************************************************************
methode
When using other tubes and colors, the mixing mode and / or layer coverage may differ
******************************************************************
General Preparations:
First install your filters for your PSP!
Masks: Save to your mask folder in PSP, unless noted otherwise
Texture & Pattern: Save to your Texture Folder in PSP
Selections: Save to your folder Selections in PSP
Open your tubes in PSP
******************************************************************
We will start - Have fun!
Remember to save your work on a regular basis
******************************************************************
1.
Choose three colors to work with.
Color 1: Foreground: #7f2608
Color 2: Background: #f5c468
Color 3: #411001
2.
Open a new transparent image of 900x550px
Paint with a Linear gradient, formed by the colors of Foreground and Background

3.
Adjust - Blur - Gaussian
Blur: 20.
Layers - Duplicate.
Effects - Geometric Effects - Perspective - Horizontal: 95, Transparent.
Repeat Perspective - Horizontal by changing the value to -95.
4.
Effects - Distortion Effects - Wave

5.
Image - Free Rotate
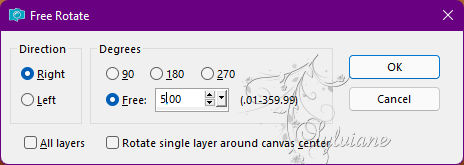
Image - Resize: 105%, Resize all layers cleared

Enable the Crop Tool > Merge Opaque > Apply

6.
With the Magic Wand: Tolerance and Feather: 0 tool, click to select the top of this effect
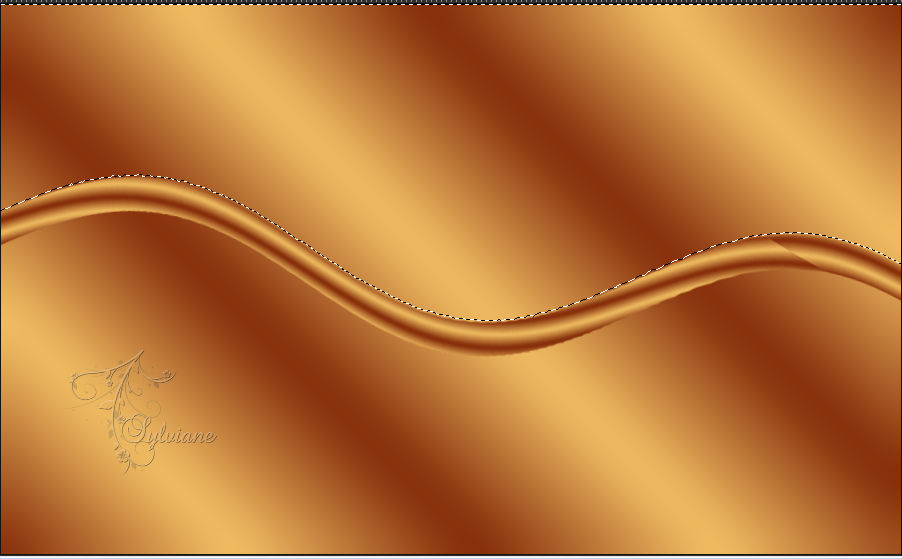
Selections - Modiy - Expand: 10.
Activate Layer Raster 1.
Selections – Promote selections to layer
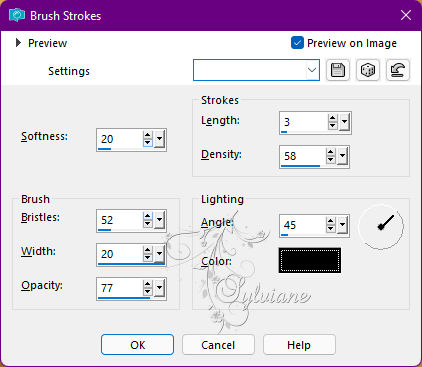
Effects - Art Media Effects - Brus Strokes:
Note: In some psp versions the Width value goes up to 20, so apply this value
7.
Layers - New Raster Layer
Paint with color 3.
Layers - New Mask Layer - From Image - NarahsMasks_1667.
Layers - Duplicate.
Layers - Merge - Merge Group.
Blend Mode: Burn.
Selections - Select None.
Effects - 3D Effects - Drop Shadow:
-75 / 70 /100/ 20 - Color: #000000 (black)
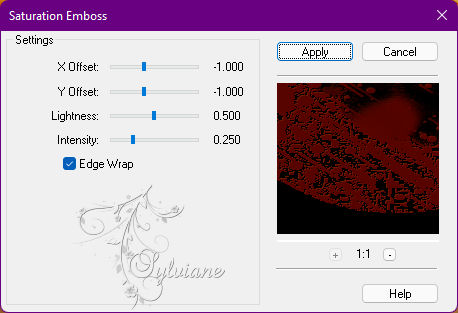
Plugin - FM Tile Tools - Saturation Emboss: Default
8.
Activate Layer Copy of Raster 1.
With the Magic Wand: Tolerance and Feather: 0 tool, click to select the underside of this effect:
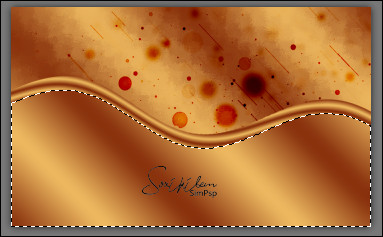
Selections - Modiy - Expand: 10.
Activate Layer Raster 1.
Selections – Promote selections to layer
Selections - Select None.
9.
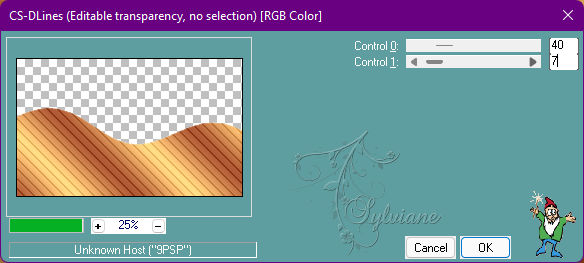
Plugins - Carolaine and Sensibility - CS-DLines
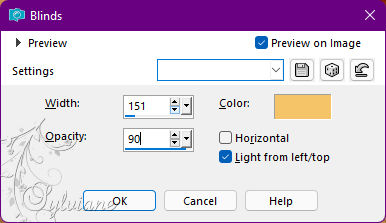
Effects - Texture Effects - Blinds:
Color: Color 2
10.
Effects - User Defined Filter - Emboss_3
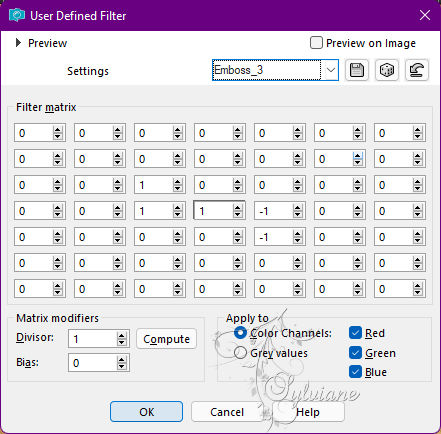
Blend Mode: Multiply
11.
Activate Layer Copy of Raster 1.
Layers - Duplicate.
Adjust - Blur - Gaussian Blur: 20.
Blend Mode: Multiply.
Layers - Duplicate.
12.
Edit - Copy on the Main tube.
Edit - Paste a New Layer.
Resize if necessary and position to the right as in the model.
If you are using the material: Resize at 65%, all layers cleared
Activate selection tool (Press K on your keyboard)
And enter the following parameters:
Pos X : 455 – Pos Y : 23
Press M.
Adjust - Sharpness - Sharpen.
Effects - 3D Effects - Drop Shadow of your choice.
13.
Layers - New Raster Layer.
Selections - Load / Save - Load selection from disk - Disguise1.PspSelection
Paint this selection with color 2 (Background).
Selection - modify - contract -8px
Paint this selection with color 1 (Foreground).
Selection - modify - contract – 4px
Paint this selection with color 3.
Selection - modify - contract – 16px
Paint this selection with color 2 (Background).
14.
Layers - New Raster Layer.
Paint this selection with color 3.
Layers - New Mask Layer layer - From Image - NarahsMasks_1667.
Layers - Merge - Merge Group.
Effects - 3 D effects - Drop shadow
1 /1/ 100/ 0 - Color: #000000 (black).
Blend Mode: Burn.
Layers - Merge - Merge Down.
15.
Plugins - Alien Skin Eye Candy 5 Impact - Glass
Settings: Clear

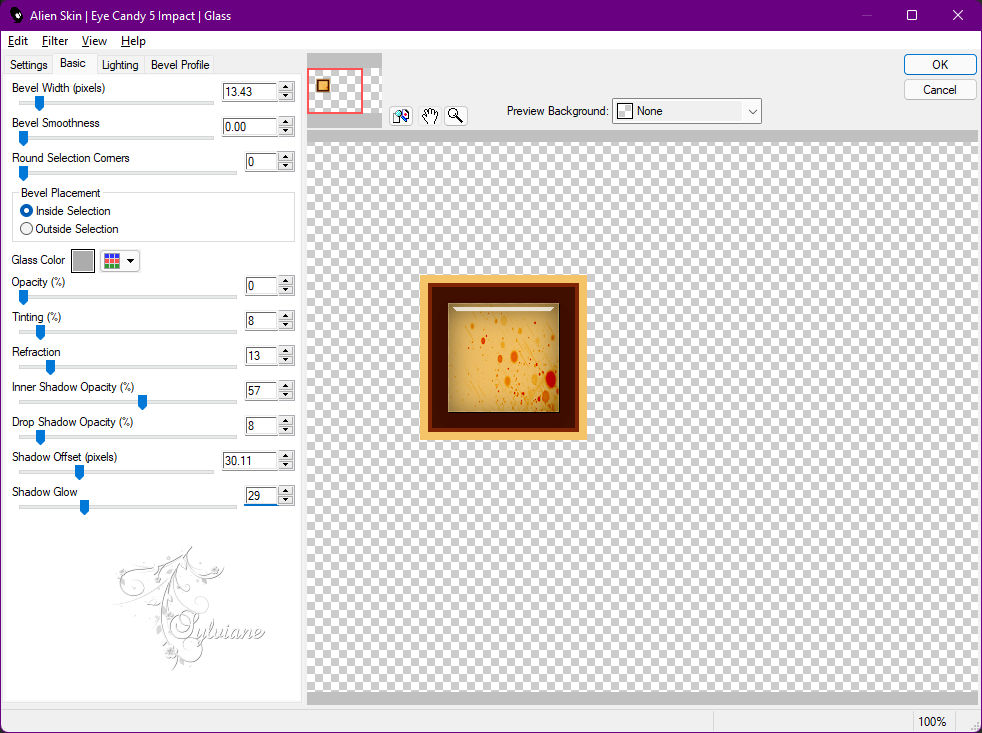
Selections - Select None.
16.
Selections - Load / Save - Load selection from disk - Disguise1.PspSelection

Selections - modify - select selection borders
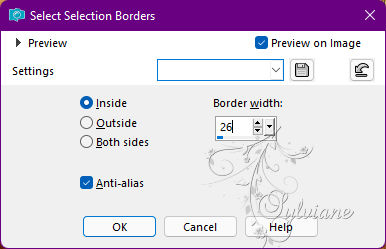
17.
Effects - 3D Effects - Inner Bevel
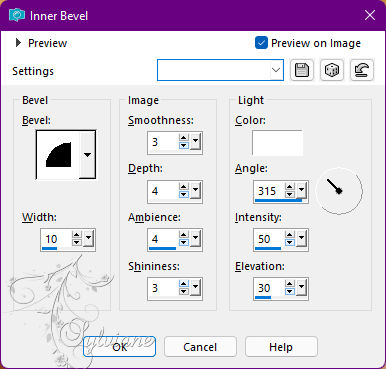
Selections - Select None.
18.
Image - Free Rotate:
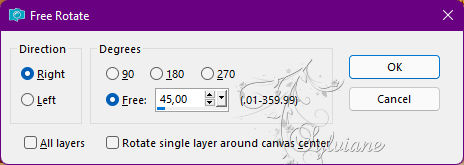
Activate selection tool (Press K on your keyboard)
And enter the following parameters:
Pos X :79 – Pos Y : 98
Press M.
19.
Layers - Duplicate.
Image > Resize: 50%, all layers desmarcado.
Activate selection tool (Press K on your keyboard)
And enter the following parameters:
Pos X :31 – Pos Y : 158
Press M.
Layers - Arrange - Move Down.
Layers - Duplicate.
Activate selection tool (Press K on your keyboard)
And enter the following parameters:
Pos X : 229 – Pos Y : 121
Press M.
Layers - Duplicate
Activate selection tool (Press K on your keyboard)
And enter the following parameters:
Pos X :249 – Pos Y : 182
Press M.
Activate the Top Layer
Layers – merge – merge down (3x)
Effects - 3D Effects - Drop Shadow:
15, 0, 100, 40, Color: #000000 (preto).
20.
Image - Add Borders – Symmetric - 1px color: 3
Image - Add Borders – Symmetric - 3px - color 2 (Background)
Image - Add Borders – Symmetric - 1px - color: 3
21.
Selections - Select All.
Image - Add Borders – Symmetric - 10px with any color.
Selections - Invert.
Paint with linear gradient in use

Adjust - Blur - Gaussian Blur:20.
Plugins - FM Tile Tools - Saturation Emboss: Default
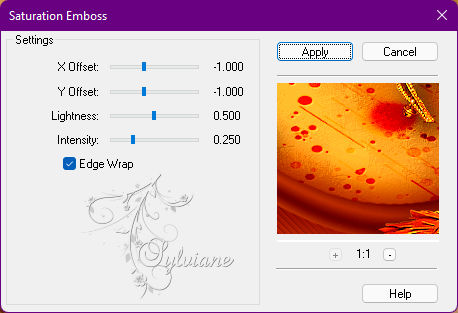
Selections - Select None.
22.
Image - Add Borders – Symmetric - 1px - color 3
Image - Add Borders – Symmetric - 6px - color 2 (Background)
Image - Add Borders – Symmetric - 1px - color 3
Selections - Select All.
Image - Add Borders – Symmetric - 40px with any color.
Selections - Invert.
Paint with linear gradient in use

Adjust - Blur - Gaussian Blur: 20.
23.
Effects - Art Media Effects - Brus Strokes

24.
Effects - 3D Effects - Inner Bevel
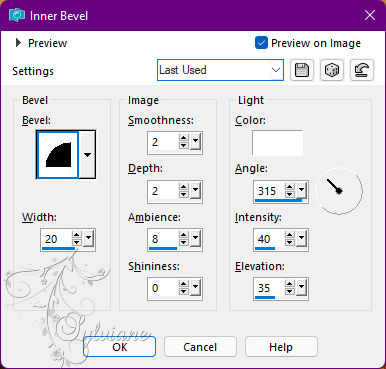
25.
Effects - 3D Effects - Chisel.
Color: #ffffff (white)
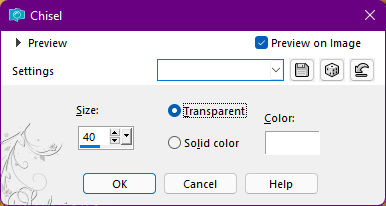
Selections - Select None.
26.
Selections - Select All.
Selections - modify - select selection borders
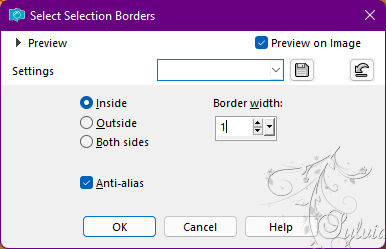
27.
Effects - 3D Effects - Chisel.
Color: #ffffff (white)
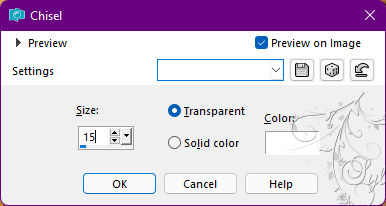
Selections - Select None.
28.
Open TextoDisguiseBySoxikibem.png
Edit - Copy
Edit - Paste as New Layer.
Activate selection tool (Press K on your keyboard)
And enter the following parameters:
Pos X :113 – Pos Y :420
Press M.
Effects - 3D Effects - Drop Shadow:
1/10/ 100 / 15 - Color: #000000 (black).
29.
Image - Add Borders – Symmetric - 1px - color 3
30.
Apply your watermark or signature.
Save as JPEG
Back
Copyright Translation © 2022 by SvC-Design